It's awesome whenever I get free Isetan vouchers!
This time, I redeemed an eyeshadow palette and lipstick from Esprique's latest makeup collection!

 |
| The black glossy packaging is sleek and classy |
 |
| Blend Dimensional Eyes A-4 (Shiny), $39 |
I am really into neutral shades recently. Browns, beiges and nudes sound good to me! Exactly why I picked out the Blend Dimensional Eyes in A-4 (Shiny). The Blend Dimensional Eyes come in 2 ranges, the 'Shiny' range and the 'Deep' range. I guess the names are pretty self explanatory :)
 |
| Left to right: champagne, white, greyish pink, medium brown |

The colors are more to frosty, but shimmery at the same time. They are not as brown/ beige as you see in the 1st and 3rd photos. There is this 'dusty' quality to the colors, especially the 2 colors from the right of the swatch photos (greyish pink & medium brown).
The finish is not intense at all, quite sheer in fact. The medium brown color could be layered to create more depth, but definitely not dark enough to use as eyeliner. I tried using the palette without eyeliner, and I looked pretty sleepy the whole day! LOL! Black eyeliner is a must for this palette.
Texture is good and easy to apply. Shades could be applied evenly easily.
 |
| Palette comes with an useful plastic sheet with application pointers |
 |
| Mellow Forming Rouge RO610 (Glow), $39 |
I love this lipstick range!! It comes in 2 categories as well, the 'Glow' range and the 'Color' range. The colors for the 1st range are lighter, whereas those in the latter range are more intense.

The texture is very much like Lavshuca's Moist Melting rouge, just even softer. The lipstick texture is like snow, and color glides on effortlessly. It's also very very moisturising. However, due to its meltingly soft texture, I am quite sure I will reach the end of the tube rather quickly.

 |
| Natural lip color |
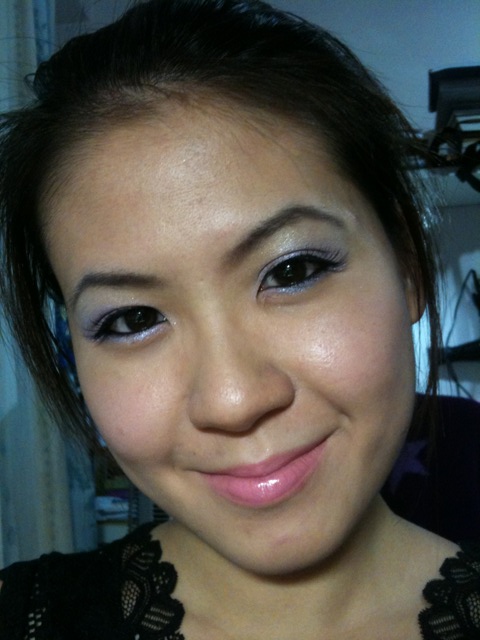
 |
| After |
Color wise, RO610 is a nudy pink. Nothing intense, just really plump looking lips after application. This shade will go super well with smoky eyes. I love this! If only I had more vouchers, I would collect more of these!


